If you want to become a data scientist, you need to learn how to use git, github and gitlab. They are good for project storage, backup and collaboration. I’m going to give you a fairly detailed list of instructions on how to set them up in this post.
Installation
- Sign up for Github
- Install Git
- Introduce yourself to Git. Make sure you ignore 8.1.
- Pick a Git client. I use SourceTree.
- Connect to Github. The link shows you how to do it using the shell. You should also learn how to do it using the git client you picked. The reason is that you rarely need to go back to the shell once you master a git client.
- Check for existing SSH keys
- If you don’t have one, create SSH keys from the shell and add the public key to Github
- Sign up for Gitlab
- Add the same public key (see step 6 and 7) to Gitlab. Afterwards, you can clone Gitlab repos using SourceTree.
- If you have two github accounts, for example, one for personal use and the other for your organization, you need to have two sets of SSH keys in order to manage your repos in both accounts using SourceTree on the same computer. Click here to learn how to set them up.
Work flow when starting a new project (I’m using Gitlab here, but the same logic also holds for Github)
- Go to Gitlab and make sure you are logged in.
- Click the big PLUS (+) button next to your profile picture to create a new project.
- After you’ve created a new project, you’ve created a repo. You should see a screen like this under the Project tab
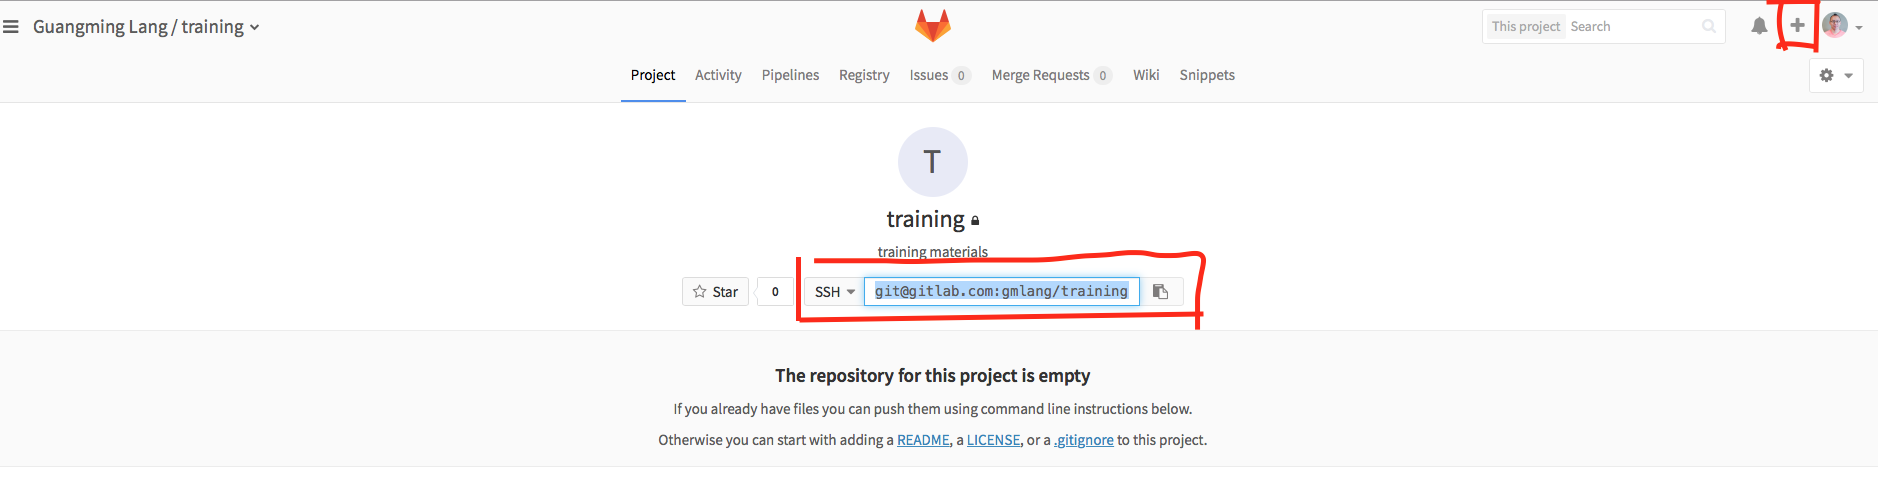
- Copy the SSH path shown in the screen.
- Open SourceTree, click New Repository -> Clone from URL.
- Paste the copied SSH path into the Source URL field.
- Specify the Destination Path and Name.
- Click Clone. Now, you can stage, commit, push and pull from SourceTree. If you are using a different git client, make sure you learn how to do these actions. Some tutorials teach you to do them inside Rstudio. Don’t do that. Let me repeat: “Don’t waste the effort connecting git/github with RStudio. Not worthy it.” Instead, use a git client (I prefer SourceTree). Leave the job of connecting git and a git hosting service (for example: github, gitlab, bitbucket) exclusively to a git client.
Ignore files
You don’t want to use git to track everything. You only want to track your code. For example, you don’t want to track files like .Rhistory, .Rapp.history and .Rproj.user/*.
Work flow when collaborating on Github
Let’s demo the work flow using the following example.
- Fork my repo (Upper right corner fork button)
- You’ll see the same repo show up under your github account. Clone it using source tree.
- Add upstream. This allows you to update your repo based on my updates. Once you add upstream, you can pull the changes I make directly to your local repo.
- Make changes to your local copy and commit and push to the repo in your github account.
- Create a pull request.
- I’ll review your pull request and decide if to merge with mine.
Exercises
- Understand git and git hosting services from the big picture level.
- Clone a repo.
- Fork a repo. A specific fork and pull practice.
- Mistakes Recovery: part1, part2.